- Facilities
- Achievement
| Parameter | Value |
| Main Disc Speed | 100- 1,100 Rpm |
| Sample Quantity | 0.5ml to 70ml |
| Grinding Bowl | Tungsten Carbide & Zirconium Oxide |
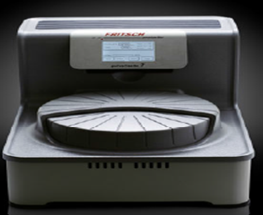
Grinding of brittle – Fibrous material to Nano & Micron Level
Development of Nano powders from ceramics and metals
Mr. Kumar Abhinav (Scientist-C)
Email: abhinav[at]cmti[dot]res[dot]in
Land Line: +91-80-22188361,
Mobile: +91 8884004124
Mr. Prakash Vinod (Scientist-F, Center Head – SMPM)
Email: prakashv[at]cmti[dot]res[dot]in
Land Line: +91-80-22188243
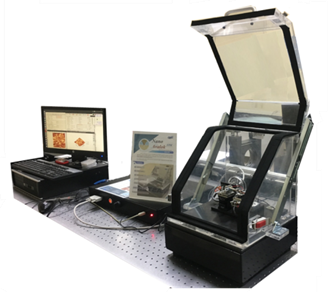
| Piezo Tube Scanner | Range: XY – 600 nm, Z – 200 nm
Resolution XY – 0.01 nm, Z – 0.003 nm |
| Tip/Sample Coarse Movement
|
Manual in all three direction
Range: 13 mm Resolution of 0.5mm in X&Z and Resolution of 5mm in Y (vertical) direction |
| Electronics
|
Tunnelling Current preamp:
Gain: 100 mV/Na, Noise: 0.02 nArms Sample Bias: ± 10 V |
| Software | GUI (Graphical User Interface) based user friendly software |
| Sample | Vertical Sample placement Up to 30 mm diameter, 5 mm thick |
| Vibration isolation | Above 5 Hz, isolation efficiency above 80% |
| Acoustic isolation | Noise attenuation above 20 dBA |
- Surface morphology study
- Molecular bonding study
- Local electron behaviour study
- Collective electron behaviour study
- Nano metric scale manipulation
Mr. Vithun S N (Scientist-C)
Email: vithun[at]cmti[dot]res[dot]in
Land Line: +91-80-22188361,
Mobile: +91 9844349034
Mr. Prakash Vinod (Scientist-F, Center Head – SMPM)
Email: prakashv[at]cmti[dot]res[dot]in
Land Line: +91-80-22188243
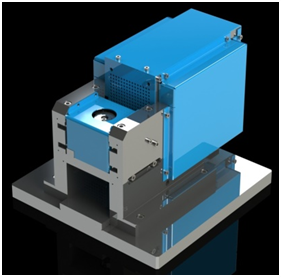
| Work Dia | Ø6-20mm |
| Surface Roughness achievable | Ra 20nm or better |
| Power | 0.5kW |
| Material Removal | 1-5mm |
| Dimensions (lxbxh) | 320mm x 280mm x 220mm |
| Media: | Magnetic Abrasive Media |
Super finishing for components like IC Engine Valves, Bearings, ID and OD of Precision Cylindrical Components & Tubes, Moulds & many more.
Mr. Naveen K (Scientist-C)
Email: naveen[at]cmti[dot]res[dot]in
Land Line: +91-80-22188361,
Mobile: +91 7411956670
Mr. Prakash Vinod (Scientist-F, Center Head – SMPM)
Email: prakashv[at]cmti[dot]res[dot]in
Land Line: +91-80-22188243
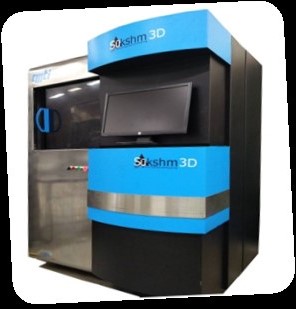
| Minimum feature size | <10µm |
| Maximum print size | 14X8X25mm |
| Layer thickness | 5um to 100µm |
| Z axis accuracy | 1µm |
| UV LED Source | 385/405nm |
| · Optimized resins with recipe parameters | |
| · Optimized Bio compatible resins | |
- Polymer based 3D Microfabrication for various applications in MEMS, Jewellery, Biomedical industries.
- Fabrication of complex 3D Micro components
- MEMS sensors, actuators, and micro bellows
- Micro fluidic channels and micro fluidic devices
- Bio medical Implants like coronary stents & scaffolds
- Micro moulds and lenses for optics industry
Mr. Harikrishna S T (Scientist-C)
Email: harithota[at]cmti[dot]res[dot]in
Land Line: +91-80-22188361,
Mobile: +91 7795090050
Mr. Prakash Vinod (Scientist-F, Center Head – SMPM)
Email: prakashv[at]cmti[dot]res[dot]in
Land Line: +91-80-22188243
| Maximum height of the component | 10 to 300 mm |
| Hydraulic Pressure Range | 15 to 100 bar |
| Media Cylinder Bore Diameter | 150 mm |
| Media Piston Stroke | 250 mm |
| Media | Visco-elastic abrasive laden polymer |
| Controller | Mini PLC- HMI Based |
Micro/Nanofinishing, Radiusing and deburring for wide range of industrial applicationslike:Aerospace, Energy, Extrusion dies,Medical, Automotive, Hydraulics / Pneumatics and Precession mechanicalcomponents.
Mr. Manjunath M A (Scientist-C)
Email: manjunathma[at]cmti[dot]res[dot]in
Land Line: +91-80-22188361,
Mobile: +91 9686267268
Mr. Prakash Vinod (Scientist-F, Center Head – SMPM):
Email: prakashv[at]cmti[dot]res[dot]in
Land Line: +91-80-22188243

| Number of Axis | 3 Axis (X & Z, C-Axis) |
| Maximum Workpiece Size | Diameter 250 mm , length 150 mm |
| Spindle Running Accuracy | ≤ 25nm |
| Work Holding Spindle Max. speed | 8,000 RPM |
| Positional accuracy | ≤ 0.3µm |
| Straightness of Slides | ≤ 0.3µm |
| Work piece accuracies | |
| 75mm dia convex (ROC-250mm): AL 6061 T6 alloy | Surface Roughness (Ra) < 2 nm, Form Accuracy (P-V) < 0.2 micron |
| Hardened Steel-60 HRC flat | Surface Roughness (Ra) <14 nm |
- Metal Mirrors for Space & Astronomical Systems
- Mirrors for Electro-optical systems
- Dies and Molds for LED Photonics & Mobile Camera lenses
- Molds and lens for Ophthalmic, Intro-ocular & Contact lenses for Medical Sectors
- Lenses for Night Vision & Thermography
- Ultra Precision Mechanical Components
Mr. Gopi Krishna S (Scientist-D)
Email: gopi[at]cmti[dot]res[dot]in
Land Line: +91-80-22188361,
Mobile: +91 9686267268
Mr. Prakash Vinod (Scientist-F, Center Head – SMPM):
Email: prakashv[at]cmti[dot]res[dot]in
Land Line: +91-80-22188243
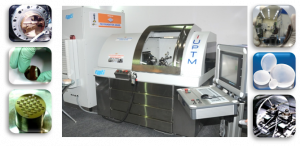
- Spherical, Aspherical lenses and mirrors, Metal mirrors for laser applications
- Special mirrors for space applications,
- Moulds for ophthalmic and LED lens manufacturing, Free form surfaces
- Precision Bearing components, Micro lens array, Micro moulds and Micro Structures
Mr. Gopi Krishna S (Scientist-D)
Email: gopi[at]cmti[dot]res[dot]in
Land Line: +91-80-22188361,
Mobile: +91 9686267268
Mr. Prakash Vinod (Scientist-F, Centre Head-SMPM)
Email: prakashv[at]cmti[dot]res[dot]in
Land Line: +91-80-22188243
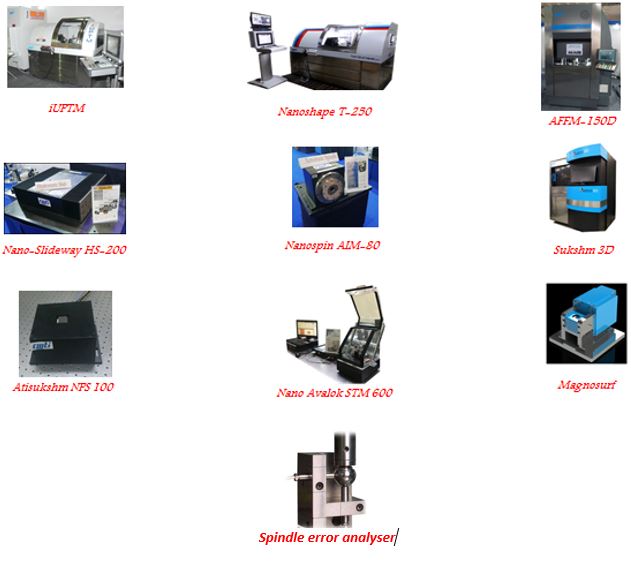
Product Development
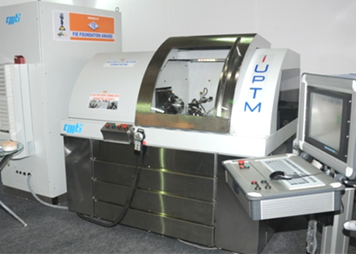
Intelligent Ultra Precision Diamond Turning Machine (iUPTM)
Intelligent Ultra Precision Turning Machine (iUPTM) is a state of the art machine, developed by CMTI, for producing non-ferrous components with optical quality (surface finish in order of few nanometers and form accuracy in sub-micron range). The Nano level surface finish achieved on components are in the magnitude of ≤ 5nm. The iUPTM has ultra precision motion systems (for spindles & slides), supported by state of the art open architecture motion controller with in-built real time machine error compensation, machine diagnostics & prognostics modules and adaptive control features. The machine has excellent static, dynamic and thermal behaviour and has accuracies in order of nanometres.
Salient Features:
- Spindle– Integrated Spindle Motor
- Slides – Linear motor driven slides
- Base– Natural Granite Bed
- Pneumatic Vibration Isolators with active leveling
- Work holding – Vacuum Chuck
- Real time machine error compensation, Real time machine diagnostics
- Control System – Open architecture CNC Controller, Adaptive control
- Command Resolution – 1nm; Feedback device Resolution < 50 pm
Applications:
- Spherical, Aspherical lenses and mirrors, Metal mirrors for laser applications
- Special mirrors for space applications,
- Moulds for ophthalmic and LED lens manufacturing, Free form surfaces
- Precision Bearing components, Micro lens array, Micro mouldsandMicro Structures
Technical Specifications:
| Number of Axis | 3 Axis (X & Z, T-Configuration, C-Axis) |
| Work head Spindle | Aerostatic Bearing, Integrated Motor Spindle |
| Slides | Aerostatic Bearing, Linear motor driven slides |
| Control System | Open Architecture Motion Controller with Adaptive Control Technology |
| Programming Resolution | 0.01nm Linear |
| Achieved Performance | Surface Roughness ≤ 8nm Ra on Aluminium |
| Targeted Performance | Surface Roughness ≤ 2nm Ra; Form accuracy ≤ 0.1µm |
| Work Holding Spindle Max. speed | 10,000 RPM |
| Feedback resolution | < 50 picometers |
| Positional accuracy | ≤ 0.4µm |
| Straightness of Slides | ≤ 0.5µm |
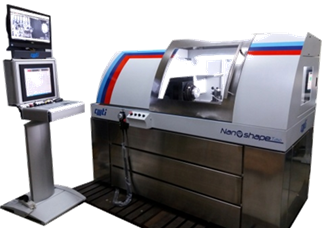
Ultra Precision Turning Machine (Nanoshape T250)
Nanoshape T250 is a highly stiff & Precision Turning machine, developed by CMTI, capable of Single Point Diamond Turning (SPDT) & Ultra precision hard turning,equipped with state of the art technologies for producing non-ferrous, ferrous and IR material components with optical quality surface finish (surface finish in the order of few nanometers and form accuracy in sub-micron range). The Nano level surface finishes achieved on components are in the magnitude of ≤ 2 nm Ra*. The machine has excellent static, dynamic and thermal behaviour and has accuracies in order of nanometres.
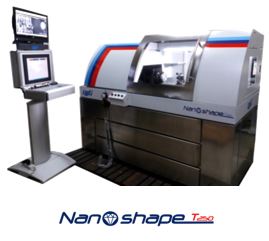
Salient Features:
- High Stiff Hydrostatic Oil Bearing Slides
- Ultra Precise Aerostatic Spindle
- Natural Granite Bed with Vibration Isolation System and active leveling
- Independent Slide configuration
- Open Architecture Motion Controller with Adaptive Control Technology
- Integrated chiller for Thermally stable slides and spindle
Applications:
- Metal Mirrors for Space & Astronomical Systems
- Mirrors for Electro-optical systems
- Dies and Molds for LED Photonics & Mobile Camera lenses
- Molds and lens for Ophthalmic, Intro-ocular & Contact lenses for Medical Sectors
- Lenses for Night Vision & Thermography
- Ultra Precision Mechanical Components
Technical Specifications:
| Number of Axis | 3 Axis (X & Z, C-Axis) |
| Maximum Workpiece Size | Diameter 250 mm , length 150 mm |
| Spindle Running Accuracy | ≤ 25nm |
| Work Holding Spindle Max. speed | 8,000 RPM |
| Positional accuracy | ≤ 0.3µm |
| Straightness of Slides | ≤ 0.3µm |
| Work piece accuracies | |
| 75mm dia convex (ROC-250mm): AL 6061 T6 alloy | Surface Roughness (Ra) < 2 nm, Form Accuracy (P-V) < 0.2 micron |
| Hardened Steel-60 HRC flat | Surface Roughness (Ra) <14 nm |
Ultra Stiff Ultra Precision Hydrostatic Slide (Nano Slideway HS200)
The vast experience of CMTI in field of Ultra precision led us to the development of Hydrostatic Bearing system. Nanoslideway delivers excellent performance in linear motion with very high stiffness & damping, for ultra precision turning, milling, boring & grinding applications.Nanoslideway is designed & built specifically for exceptionally high stiffness and excellent geometric characteristics. Nanoslideway incorporates a box type Preloaded Hydrostatic bearing with outstanding stiffness that is ideal for heavy or offset loading.
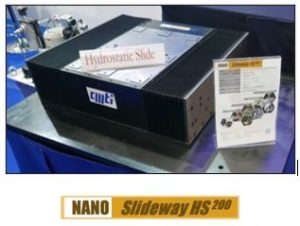
Salient Features:
- Hydrostatic oil Bearing with theoretical infinite lifetime
- True motion, zero stick-slip, zero backlash & Maximum positioning accuracy
- High stiffness for Heavy loads & excellent geometric performance
- High Dampening effect from oil film for vibration from machining process
- Thermally stable, with heat dissipation by oil & additional water cooling
- Direct drive with Integrated Linear motor with low cogging force
- Ultra precision Linear Glass Scale for position feedback
Applications:
- Nano Slideway HS 200 (Ultra stiff ultra precision hydrostatic slide) is ideally suited for development of
- Ultra Precision Turning Machines,
- Ultra Precision Milling Machines,
- Ultra Precision Boring,
- Jig Boring & Grinding Machines.
Technical Specifications:
| MODEL & TYPE | HS 200; Fully constrained oil hydrostatic, box way slide |
| TRAVEL | 200 mm (8 Inch) |
| LOAD CAPACITY & STIFFNESS | 1000Kg (10,000 N)
1000N/µm |
| DRIVE SYSTEM | Brushless DC Linear Motor |
| FEEDBACK TYPE | Ultra precision Glass Scale |
| FEEDBACK RESOLUTION | 32 picometer |
| STRAIGHTNESS | HORIZONTAL :0.2 µm over full travel
VERTICAL : 0.4 µm over full travel |
| FEED RATE (WORKING) | UPTO 1000 mm/min |
Ultra precision Aerostatic Bearing spindle (Nanospin-AM80)
CMTI has indigenously developed a state of the art Aerostatic Bearing Spindle named Nanospin – AIM80 with nanometric motion accuracy for ultra precision machining and metrology applications. The Nanospin has excellent static, dynamic and thermal behaviour and has spindle running accuracy in the order of nanometres.
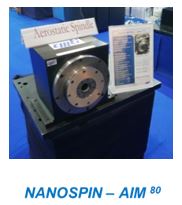
Salient Features:
- Motion Error in Nanometres
- High Bearing Stiffness
- High damping
- High Dimensional stability
- Near Zero Static Friction
- Near Zero Thermal Distortion
- No Harmonics
- No Air Hammer Effect
- Laminar Flow
- Higher Working Speed Range
- Integrated Motor
- Hollow Spindle for Vacuum Chuck
- Water Cooled
Applications:
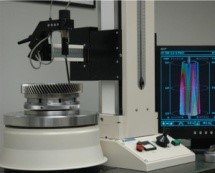
Aerostatic bearing spindle acts as the heart of ultra precision machines and metrology equipments.
- Single Point Diamond Turning (SPDT)
- Ultra Precision Turning
- Ultra Precision Milling & Micro Milling
- Ultra Precision Grinding
- Form Testers

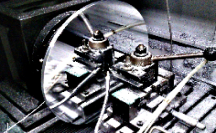
Technical Specifications:
| Bearing Type | Aerostatic Bearing |
| Motion Error | ≤ 100nm |
| Spindle Speed | 5,000 RPM |
| Stiffness | Radial – 80 N/µm
Axial – 200 N/µm |
| Max. Load Capacity | Radial – 750 N
Axial – 1000 N |
| Motor Type | Integrated DC Brushless motor |
| Torque | 5 N-m |
| Cooling | Water Cooling |
Abrasive Flow Finishing Machine (AFFM-150D)
CMTI in collaboration with IIT Kanpur has indigenously developed Abrasive Flow Finishing Machine. The machine is capable of finishing, deburring and polishing complex and difficult to finish precision components.AFM is an ergonomic, user friendly with easy maintenance design with a PLC based HMI controlled system and economically viable alternate for micro and nano finishing.
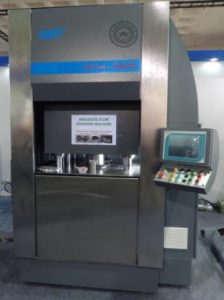
Salient Features:
- Super finish / deburr ID and OD of components
- Radiusing of sharp edges
- Finishes inaccessible areas & complex internal passages
- Temperature control of abrasive laden polymer media
- Simultaneous processing of multiple passages
Applications:
Micro/Nanofinishing, Radiusing and deburring for wide range of industrial applicationslike:Aerospace, Energy, Extrusion dies,Medical, Automotive, Hydraulics / Pneumatics and Precession mechanicalcomponents.

Technical Specifications:
| Maximum height of the component | 10 to 300 mm |
| Hydraulic Pressure Range | 15 to 100 bar |
| Media Cylinder Bore Diameter | 150 mm |
| Media Piston Stroke | 250 mm |
| Media | Visco-elastic abrasive laden polymer |
| Controller | Mini PLC- HMI Based |
Microfabricaion system (Sukshm 3D)
The revolutionary micro-fabrication system enables complex 3D ultra fine solids to be made in a short time by means of spatial light modulation technique.

Salient Features:
- The revolutionary micro-fabrication system enables complex 3D ultra fine solids to be made in a short time by means of spatial light modulation technique.
- A UV-curable resin having a hitherto unachieved resolution is cured at a super-precision resolution by a high-precision digital light exposure mechanism.
- 3-D structures are created by the layer-by-layer forming method, under which 3-D ultra-fine solids are formed automatically by repeated light exposure and resin coating.
- Ultra-fine Features down to 10um level cab be fabricated
- Layer thickness can be optimized to 5um level so that staircase effect can be eliminated with continuous exposer of UV projection
Applications:
- Polymer based 3D Microfabrication for various applications in MEMS, Jewellery, Biomedical industries.
- Fabrication of complex 3D Micro components
- MEMS sensors, actuators, and micro bellows
- Micro fluidic channels and micro fluidic devices
- Bio medical Implants like coronary stents & scaffolds
- Micro moulds and lenses for optics industry
Technical Specifications:
| Minimum feature size | <10µm |
| Maximum print size | 14X8X25mm |
| Layer thickness | 5um to 100µm |
| Z axis accuracy | 1µm |
| UV LED Source | 385/405nm |
| · Optimized resins with recipe parameters | |
| · Optimized Bio compatible resins | |
Closed Loop Three Direction Nanopositioning Stage (Atisukshm MPS100)
The 3 directional closed loop translational nanopositioningstage that has high resolution, better accuracy, good repeatability and also having minimum decoupled motion between axes. Nanopositioning stage prototype capable of moving 70 micron in XY direction and 15 micron in Z direction with resolution of 1nm (XY) and 0.3nm in Z direction respectively.
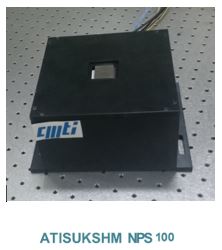
Salient Features:
- 100 μm XY range of motion
- 15 μm Z range of motion
- Minimum cross axis motion
- Closed loop control
- Better thermal stability
- Better dynamic response
- Less hysteresis
- Less non-linearity error
- User defined motion profiles (Scanning Applications)
- User friendliness
Applications:
- Scanning Probe Microscope
- Scanning Electron Microscope
- Nanoindenter
- Nanolithography
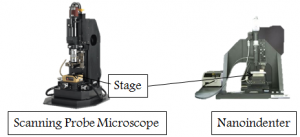
Technical Specifications:
| Ranges of motion (XY) | 100μm |
| Ranges of motion (Z) | 15μm |
| Resolution (XY) | 1nm |
| Resolution (Z) | 0.2 nm |
| Repeatability | 2nm |
| Resonant Frequency | 460 Hz |
| Maximum load | 0.25 Kgs |
Scanning Tunnelling Microscope (Nano Avalok STM-600)
CMTI in collaboration with i2n Technologies has developed a portable Scanning Tunneling Microscope, capable of imaging sample at atomic resolution. The technology primarily address the need of academic institutions, R&D labs and Industries, with relatively affordable STM setup that could be utilized in nanotechnology research. The compact portable system which potentially acquires the surface topography with quick, reliable and repeatable measurements.
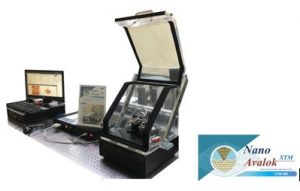
Salient Features:
- Easy to use
- Atomic resolution
- Table top system
- Portable and compact
- View of tip approach to sample
- Quick exchange of tip and sample
- In-built vibration & acoustic enclosure
Applications
- Surface morphology study
- Molecular bonding study
- Local electron behaviour study
- Collective electron behaviour study
- Nano metric scale manipulation
Technical Specifications:
| Piezo Tube Scanner | Range: XY – 600 nm, Z – 200 nm
Resolution XY – 0.01 nm, Z – 0.003 nm |
| Tip/Sample Coarse Movement
|
Manual in all three direction
Range: 13 mm Resolution of 0.5mm in X&Z and Resolution of 5mm in Y (vertical) direction |
| Electronics
|
Tunnelling Current preamp:
Gain: 100 mV/Na, Noise: 0.02 nArms Sample Bias: ± 10 V |
| Software | GUI (Graphical User Interface) based user friendly software |
| Sample | Vertical Sample placement Up to 30 mm diameter, 5 mm thick |
| Vibration isolation | Above 5 Hz, isolation efficiency above 80% |
| Acoustic isolation | Noise attenuation above 20 dBA |
Magnetic Abrasive finishing (Magnosurf)
CMTI has developed MAF Process Technology for finishing of components used in industrial application. In MAF Process, under the effect of magnetic field, magnetic abrasives are arranged orderly along the magnetic line to form a flexible abrasive brush. Finishing happens when there is relative motion between the magnetic abrasive brush and the work piece. CMTI can develop Tools and Equipment to meet industrial requirements in nanofinishing of precision components using MAF Technology.
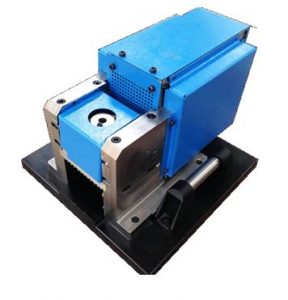
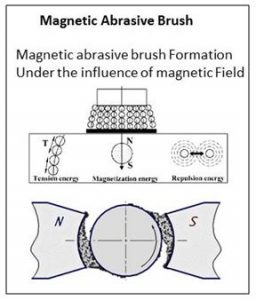
Salient Features:
- Process is comparatively very economical for finishing
- Can achieve surface finish up to 20nm or better
- MRR can be controlled by varying brush stiffness
- No dressing required as abrasives self align and sharpen
Applications:
Super finishing for components like IC Engine Valves, Bearings, ID and OD of Precision Cylindrical Components & Tubes, Moulds & many more.
Technical Specifications:
| Work Dia | Ø6-20mm |
| Surface Roughness achievable | Ra 20nm or better |
| Power | 0.5kW |
| Material Removal | 1-5mm |
| Dimensions (lxbxh) | 320mm x 280mm x 220mm |
| Media: | Visco-elastic abrasive laden polymer |
Spindle error analyser
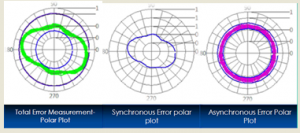
The Spindle Error Scope is standalone module developed by CMTI for measurement and analysis of spindle running accuracies. The measurements of spindle error motions can be carried out as per international standards (ASME B5.54, ISO 230-7) using this analyzer. The system can measure geometrical errors (axial, radial & tilt) of spindles with both fixed and rotating sensitive directions. The analysis can separate the errors (synchronous and asynchronous). The frequency analysis can help in identification of the source of error. The analyzer can be also used to measure and analyze thermal drifts.
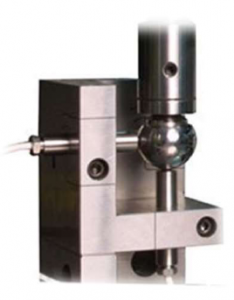
Salient Features:
- Standalone system with modules for fixed and rotating sensitive direction spindles
- Non-Contact displacement measurement through Nano precision eddy current probes
- Data acquisition with NI-hardware
- Geometrical error measurement and separation
- Frequency analysis for identification of root cause of error
- Thermal drift measurements
Applications:
- All Machine Tool Spindle Manufacturers
- All Machine Tool Manufacturer
- All spindle testing and repair organizations
- Machine tool testing and certification agencies
Technical Specifications:
| Parameter/ Specification | Description |
| Type of Probes | Ultra Precision Capacitive Probes |
| Number of probes | 3 |
| Static resolution of probes | 1 nm |
| Sensor linearity | 0.15 % of full scale (~300 nm for 200 um Range) |
| Measuring Range | 200 µm |
| Probe Sensitivity | User Defined (0.04 V/µm) |
| Number of Axes/Channels | 3 |
| RPM range | 500-6000 |
| Sampling Rate | Upto 10 kHz |
| Displayed Revolutions | 32 for Each update |
| System capability (as validated) | 0.5 µm and above |
| Axial Error | Yes |
| Radial Error – Fixed Sensitive | Yes |
| Radial Error – Rotating Sensitive | Yes |
| FFT | Yes |
| Oscilloscope function | Yes |
| Calibration | Sensors (Static) & Target Ball |
| Device Communication | NI DAQ with 24 bit |
| Target | 1” Ball Target |
| Probe Nest | 3/5 Probe Nest |
| Display Features | Polar Plot View for v Total Error v Synchronous Error v Asynchronous Error |
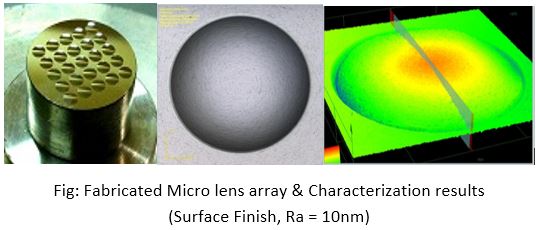
The experimentation and characterization results prove the feasibility of fabricating moulds for micro lens array on iUPTM. The following can be inferred from the characterization results.
- a) Well defined micro lens geometry is fabricated.
- b) Mirror like surface finish in the range of few nanometers (<11nm) have been achieved on micro lens array surface.
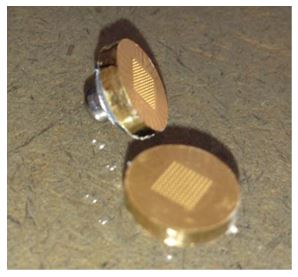
Micro needle array based electrode for bio-potential measurement
Microneedle Electrode Patch can be used for EEG measurement, Sleep and Alertness monitoring, Anaesthesia monitoring, Diabetes treatment, Electrophoresis treatment, Drug Delivery (with drug coating) and many more life saving applications.
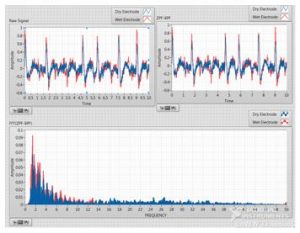
Microneedle with Tip Ø5-10µm for EEG Measurement
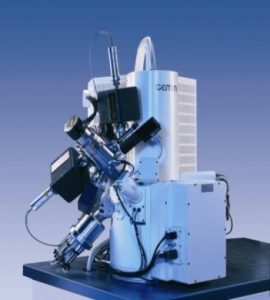
Focused Ion Beam Machining
Make: Carl Ziess Model: Neon-40, FESEM/FIB
Features:
- Focused Ion Beam Machining and Lithography.
- Advanced EDS and EBSD imaging systems.
- Field Emission Scanning Electron Microscope with a resolution up to 1.1nm
Specification:
| Parameter | Value |
| Resolution | 1.1nm |
| FIB | Nano scale machining . GIS assisted milling and deposition, TEM Lamella preparation, |
Applications:
- Micro and Nano machining.
- Micro and nano prototyping.
- 3D and magnified imaging techniques.
- Nano-manipulation and nano probing.
- Material Deposition.
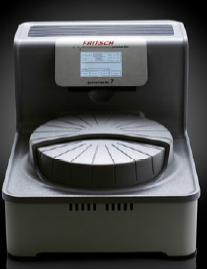
Ball Mill
Make: Fritsch, Pulverisette 7 Premium Line
Features:
- Dry/wet grinding
- Safe and reliable
- Automatic detection of the inserted grinding bowls via a special RFID chip.
- Easy GTM facility for real-time monitoring of temperature and pressure in grinding.
Specification:
| Parameter | Value |
| Main Disc Speed | 100- 1,100 Rpm |
| Sample Quantity | 0.5ml to 70ml |
| Grinding Bowl | Tungsten Carbide & Zirconium Oxide |
Application:
Grinding of brittle – Fibrous material to Nano & Micron Level
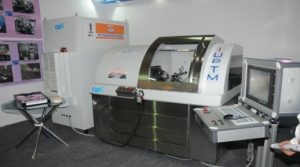
Intelligent Ultra Precision Diamond Turning Machine (iUPTM)
Features:
- Surface finish upto 5nm on non-ferrous materials
- Command Resolution – 1nm
- Feedback device Resolution < 50 pm
Specifications:
| Parameter | Value |
| 3-Axis | (X& Z , C-axis) |
| Maximum Spindle Speed | 10000 rpm |
| Open Architecture Motion controller with adaptive control technology | |
Applications:
- Spherical and aspherical lenses, mirrors, molds for lens manufacturing,
- Precision Bearing components and Fresnel surfaces.
Abrasive Flow Machine (AFM-150D)
Features:
- Super finish / deburr ID and OD of components
- Radiusing of sharp edges
- Finishes inaccessible areas & complex internal passages
Specifications:
| Parameter | Value |
| Maximum height of the component | 10 – 300 mm |
| Hydraulic Pressure range | 15 – 100 bar |
| Media cylinder bore diameter | 150 mm |
| Media piston stroke | 250 mm |
| Media:
|
Visco-elastic abrasive laden polymer |
Application:
Automotive parts (like fuel injectors etc.), Aerospace components, Medical implants and Dies & Moulds

Magnetic Abrasive Flow finishing – Magnosurf
Features:
- Process is comparatively very economical for finishing
- Can achieve surface finish up to 20nm or better
- MRR can be controlled by varying brush stiffness
- No dressing required as abrasives self align and sharpen
Specifications:
| Parameter | Value |
| Work Dia | Ø6-20mm |
| Surface Roughness achievable | Ra 20nm or better |
| Power | 0.5kW |
| Material Removal | 1-5mm |
| Dimensions (lxbxh) | 320mm x 280mm x 220mm |
| Media:
|
Visco-elastic abrasive laden polymer |
Applications:
Super finishing for components like IC Engine Valves, Bearings, ID and OD of Precision Cylindrical Components & Tubes, Moulds & many more.

- Intelligent Ultra Precision Turning Machine (iUPTM) won the “FIE foundation Award” at IMTEX 2013 for Innovative Product Development.
FIE Foundation Award Ceremony at IMTEX 2013

- “Nanoshape T250 – Ultra Precision Turning Machine” won the “FIE foundation Award” at IMTEX 2019 for Innovative Product Development.
FIE Foundation Award Ceremony at IMTEX 2019

- The Team of “Nanoshape T250” was awarded the Best Project Team Award at CMTI’s Foundation Day.
- Vithun S N, Narendra Reddy T, Prakash Vinod. “Investigation on Nanoscale Imaging of Gold Sputtered Sample by Scanning Tunneling Microscope”, Materials Today: Proceedings 22, 2020. 2439–2445.
- Manjunath M A, Prakash Vinod, Balashanmugam N, Sankar M R. “Abrasive flow finishing for surface roughness improvement of Aluminum propeller: A case Study”. 9th International Conference of Materials Processing and Characterization, ICMPC-2019. Materials today proceedings.
- Karthik M S, KuppuSwamy R, Raju V R, Manjunath M A, Balashanmugam N. “Study on effect of Abrasive flow polishing on Ball nose end mill”. International conference on Precision, Meso, Micro & Nano engineering COPEN-11, 2019.
- Manjunath M A, Murugan A, Prakash Vinod, Balashanmugam N. “Surface roughness improvement by removal of recast layer on Wire Electrical Discharge Machined surface through Abrasive Flow Finishing Machine. Advances in Micro and Nano Manufacturing and Surface Engineering, Lecture Notes on Multidisciplinary Industrial Engineering Springer Nature Singapore Pte Ltd. 2019.
- HarikrishnaSatishThota, Naveen K, Ankit K, Balashanmugam N. “Design and Development of Dry Microneedles Electrode Based Portable Wireless Instrumentation System for EEG Acquisition” International Journal of Instrumentation Technology Vol.2 No.2, 148 – 164; 2019
- Naveen K, Vignesh V Shanbhag, N Balashanmugam, Prakash Vinod. “Ultra-precision Finishing by Magnetic Abrasive finishing Process”, Materials Today: Proceedings, 5 (2018) 12426–12436
- K, Vignesh.V.Shanbhag, N.Balashanmugam, Prakash Vinod. “Investigation of magnetic abrasive finishing using unbonded magnetic abrasives with double pole arrangement, International Journal of Manufacturing Technology & Management (IJMT)- Vol. 31, No. 4, 2017
- Balashanmugam N, Naveen K, Prasad Krishna, Mohan Kumar G C. “Design and development of microneedle array based electrode for bio-potential measurement, International journal of Nano Manufacturing (IJNM) Vol. 13, No. 3, 2017
- Kumar Abhinav, Naveen K, HarikrishnaThota, Prakash Vinod and N Balashanmugam, “Development of Sintered Magnetic Abrasive Media for Flat and Cylindrical Components Finishing by Magnetic Abrasive Finishing”, proceedia of 10th international conference on precision, meso, micro and nano engineering (COPEN), Dec 07-09, 2017
- Narendra Reddy T, Vithun S N, Prakash Vinod, Shrikantha S Rao, Mervin Herbert. ” Development of high speed closed loop operation for single notch flexure based Nanopositioning system”, International Journal of Precision Technology, Vol.7, No.1, 2017
- Vignesh V Shanbhag, Naveen K. Balashanmugam N, Prakash Vinod. “Modeling for Evaluation of Surface Roughness in Magnetic Abrasive Finishing of Flat Surfaces”, International Journal of Precision technology (IJPTECH) – Vol. 6, No. 2, 2016
- Narendra Reddy T, Vithun S N, Prakash Vinod, Shrikantha S Rao, Mervin Herbert. “Design & Implementation of Closed loop Nanopositioning Stage”, presented at 1st International Conference on Nanoscience and Nanotechnology 2016 (ICNAN 2016) organized at VIT, October, 2016.
- Narendra Reddy T, Vithun S N, Prakash Vinod, Shrikantha S Rao, Mervin Herbert. “A high speed portable XY flexure-based Nanopositioning stage, International Journal for Scientific Research & Development. Vol.4, January 2016, Issue 6, Pages 868-87
- Narendra Reddy T, Vithun S N, Prakash Vinod, Shrikantha S Rao, Mervin Herbert. “A compact XY flexure based nanopositioning stage for Scanning Probe Microscope (SPM)”, Manufacturing Technology Today. Vol.15, October 2016, Issue 10, Pages 3-8
- Narendra Reddy T, Vithun S N, Prakash Vinod, Shrikantha S Rao, Mervin Herbert. “Development of high bandwidth flexure based stage for Nanopositioning applications”, Advanced Science Letters- American Scientific Publishers, Vol.24, No.8,2016
- Vithun S N, Prakash Vinod, Narendra Reddy T, Shashi Kumar P V. “Design and analysis of a single-flexure parallelogram mechanism-based X-Y nanopositioning stage”, Int. J. of Mechatronics and Manufacturing Systems Vol.9, January 2016 No.1, pp.24 – 35
- Balashanmugam N, Naveen K, Prasad Krishna, Mohan Kumar G C. “Fabrication of Polymeric Microneedle Array by Micromachining &Micromolding” International Journal of Engineering and Innovative Technology (IJEIT), Volume 5, Issue 5, November 2015
- “Mechanical Characterisation of UV Photo-Polymerised PMMA with different Photo-Initiator Concentration” at ICPC-2014 Conference held at NITK-Suratkal between 18-19 Dec 2014
- HarikrishnaSatishThota, Naveen K, Ankit K, Balashanmugam N. “Design and Development of Dry Microneedles Electrode Based Portable Wireless Instrumentation System for EEG Acquisition”, International Journal of Instrumentation Technology, Inderscience Publications (Accepted)
- Gopi Krishna S, VR Raju, K Ankit, PV Shashikumar., “Manufacture of micro sized threads for micro actuator of laser grating mount”., The International Journal of Advanced Manufacturing Technology Volume 61, Pages 1215–1220, 2012.
- Gopi Krishna S, Prakash Vinod, PV Shashikumar, R Komanduri., “Design and Development of a Flexure Based Micro-Height Adjustment Unit for Tool Post of Ultra Precision Turning Machine”., Journal of Manufacturing Technology Research, Vol. 4, Issue. 1/2, Pages 61-73, 2012.
- R. Periyanan, U. Natarajan, PV Shasi Kumar, M. Chellamalai, Gopi Krishna S., “Overview of Micro-Manufacturing”., Manufacturing Technology Today 10 (5), 3-15, 2011.
- Gopi Krishna S, Prakash Vinod, PV Shashi Kumar., “Design Considerations of Nanometer Resolution Aerostatic Spindle Bearing for Ultra Precision Machining”., Manufacturing Technology Today 9 (1), 3-7., 2010.
- “Magnetic Abrasive Finishing Apparatus and Arrangement and Method Retaining Magnetic Abrasives within Working Zone” Indian Patent Application No: 201841009353 dated: 14-03-2018)
- “System and Method for making micro needles using microstereo lithography”
Indian Patent Office Application No.: 660/CHE/2015 dated 11.2.15 - “A Low Frequency Portable Vibration Isolation System”Indian Patent Application No: 201941032175 dated 08.08. 2019
- “An Acoustic Enclosure System”Indian Patent Application No: 201941032175 dated 08.08. 2019
- Scanning Tunneling Microscope, NanoAvalok STM (Word) – Indian Patent Office Application No.:3863098, dated: 29.10.2018
- Scanning Tunneling Microscope, NanoAvalok STM (Logo) – Indian Patent Office Application No.:3863099, dated: 29.10.2018
- Microstereolithography system a.k.a SUKSHM 3D (Logo and Word) – Indian Patent Office Application No.: 3894838/39 dt. 23/07/2018
- “NANOSHAPE” (Word) Trademark No.: 3726286 dated 12/01/18
- “NANOSHAPE T-250” (Logo) Trademark No.: 3726287 dated 12/01/18
- “Turning Machine”, Design Registration Application No: 311354


